How to create a campaign using LinkedIn URL?
Campaign | Create a campaign | What is a campaign
Steps to set up:
- Click on Campaigns
- Click on Add new campaign
- Choose the type of campaign(Invitation, Messaging, InMail, Invite Only, Follow, Profile visit)
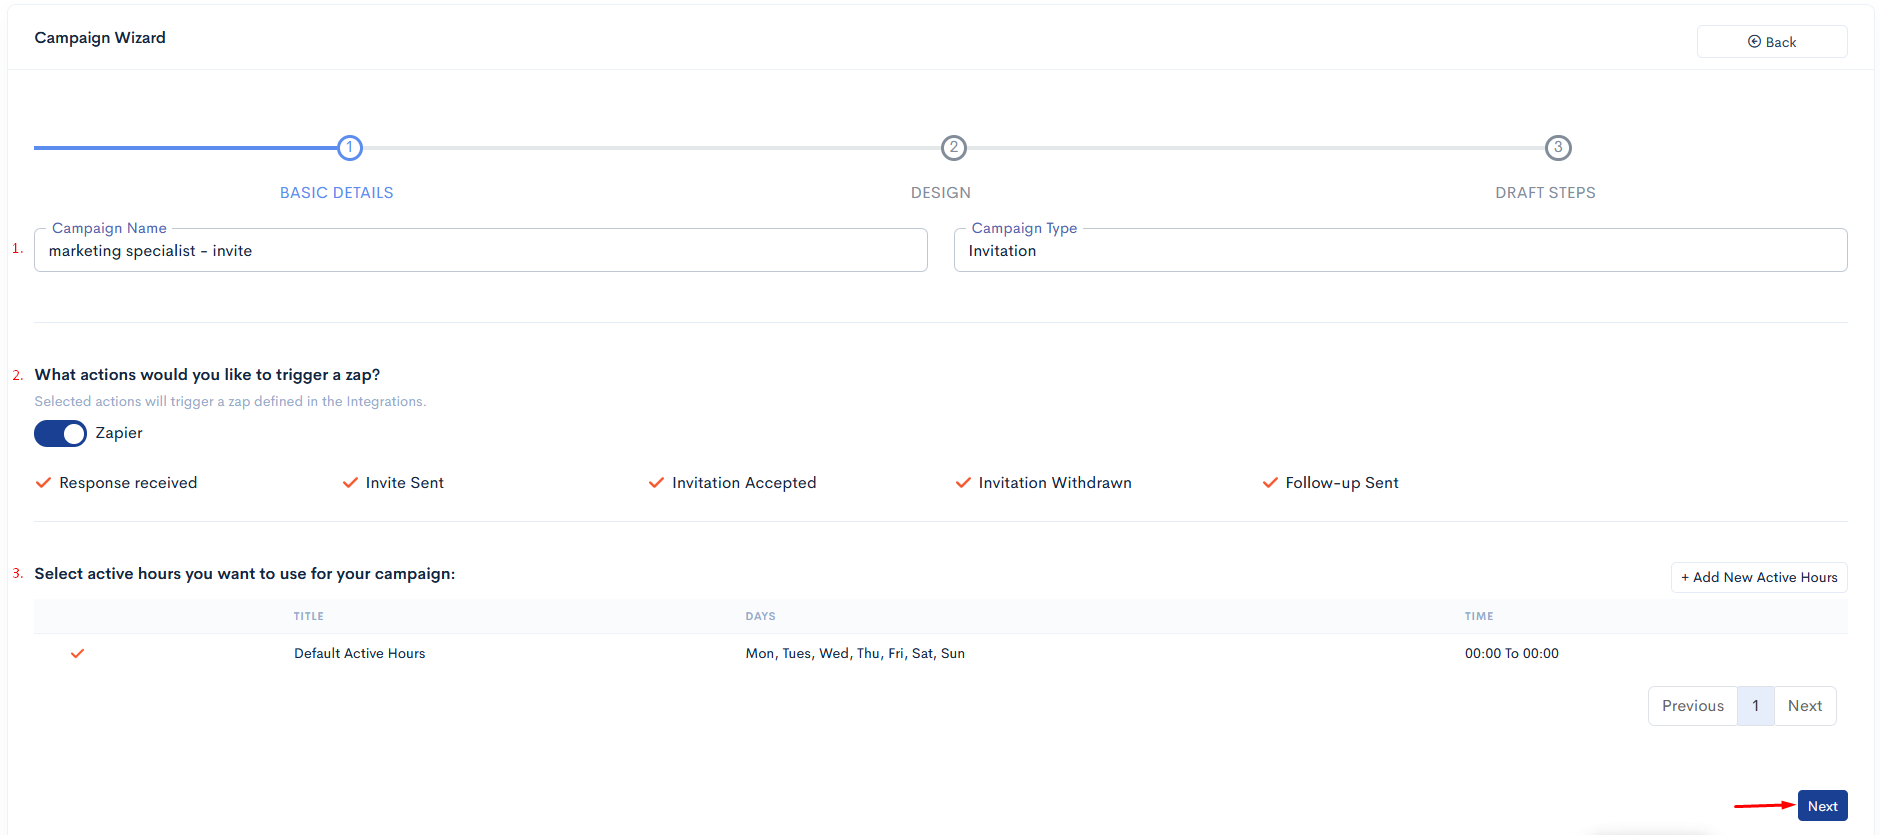
- Fill in a Campaign name
- Turn on zapier switch to actions will trigger a zap (Invite Sent, Response received, Invitation Accepted, Invitation Withdrawn, Follow-up Sent)
- Choose working hours you want to use for your campaign either add new working hours.
- Choose any type of source(LinkedIn URLs, CSV File, Webhook Profiles, Google Sheet)
- Add People
- Go to next for Steps
- Write a body message for the first message (which will be sent with your connection request)
- Choose the type of template you want
- (optional) Add follow-up messages.
- Set Withdraw Days(By default 45 Days).
- Click on Submit.
- Go to Campaigns.
- Click on the Start button of the created campaign.
- After you have to see the paused and stop button.(when it’s activated campaign)
- Set campaign limits (how many requests it sends per day) – the maximum is 100
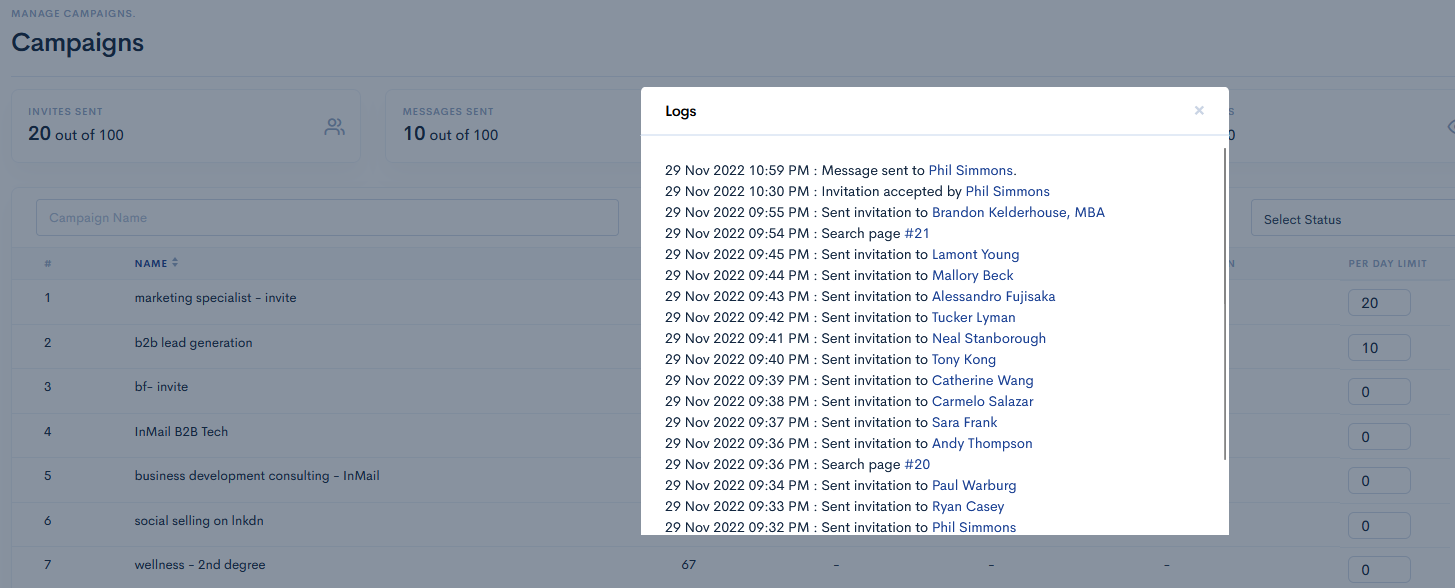
- Then, Click on campaign name. you have to see the activities logs of that running campaigns.
You can also edit the name of the campaign in this menu or delete a campaign.
You can create as many campaigns as you want, just remember that LinkedLite won't send more connections/messages than your daily limit (maximum 100).
In order to create a campaign, go to the menu on the left and click on Campaigns. This will lead you to a page with all your current campaigns (if you have any) and there you can create a New Campaign by clicking on Add campaign.

After you click on Add New Campaign, you will be sent to another page. There you should first name your campaign.
Then you should choose whether to create a Messenging Campaign or an Invitation Campaign. The difference between the two campaigns is that the Invitation campaign is used to make new connections (send connection requests + messages) while the Messaging campaign is used to send messages to already established 1st-degree connections in LinkedIn.
after you've to select campaigns types like Invitation campaign and Messaging campaign.
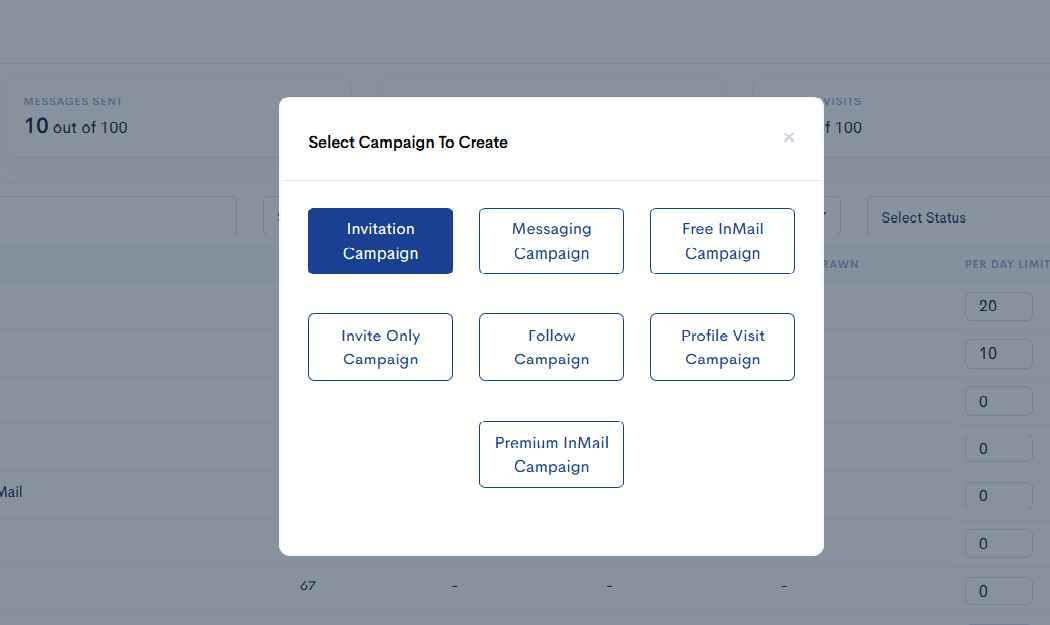
Once you’ve select the campaign type after you’re sent to a new page where you should fill in the details about the campaign.
Once you’ve filled the previous form after you're sent to a new page for select the sources.
campaign sources :
- Linkedin URLs
- CSV files
- Webhook Profiles
- Google sheet
Linkedin URLs :
1st degree Linkedin search URLs is used for the Messenging campaigns. 2nd and 3rd Degree Linkedin search URLs,Post urls,Event attendees url is used for sending invite and message from the Invitation campaigns.
Once, put Linkedin URLs and press enter. you have to add multiple URLs for the same campaigns.
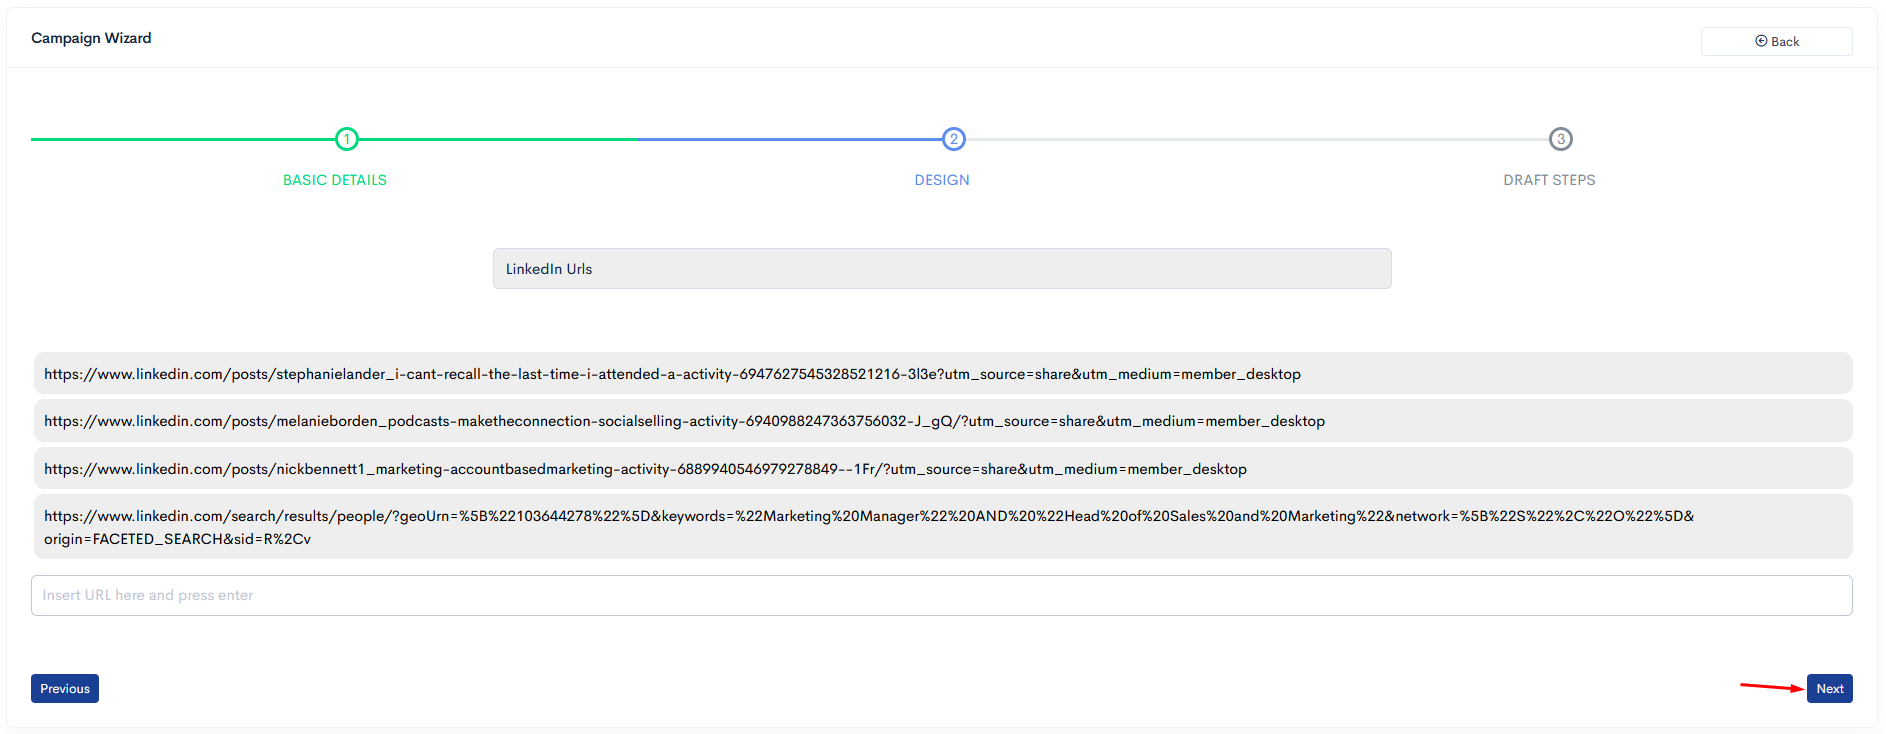
Once you’re done with importing people into your campaign using Linkedin URLs, you can go to the next step in the menu Steps to create the messages you want to send with your connection requests.
You should type in the section Body to create a message to accompany your connection request. Eventually, an alternative body can be created in case there are character limitations set by LinkedIn.
In this section, you can also create follow-up messages to send. The follow-up messages are messages which are sent after there is an established connection but still no response to the first message you sent.
Send trigger on Zapier steps while sending follow-up messages.
LinkedLite provides the most useful feature is a template. you have set your own templates. Either you have created a new one from the template section.
Set withdraw days according to your choice. We have to set by default 45 days.
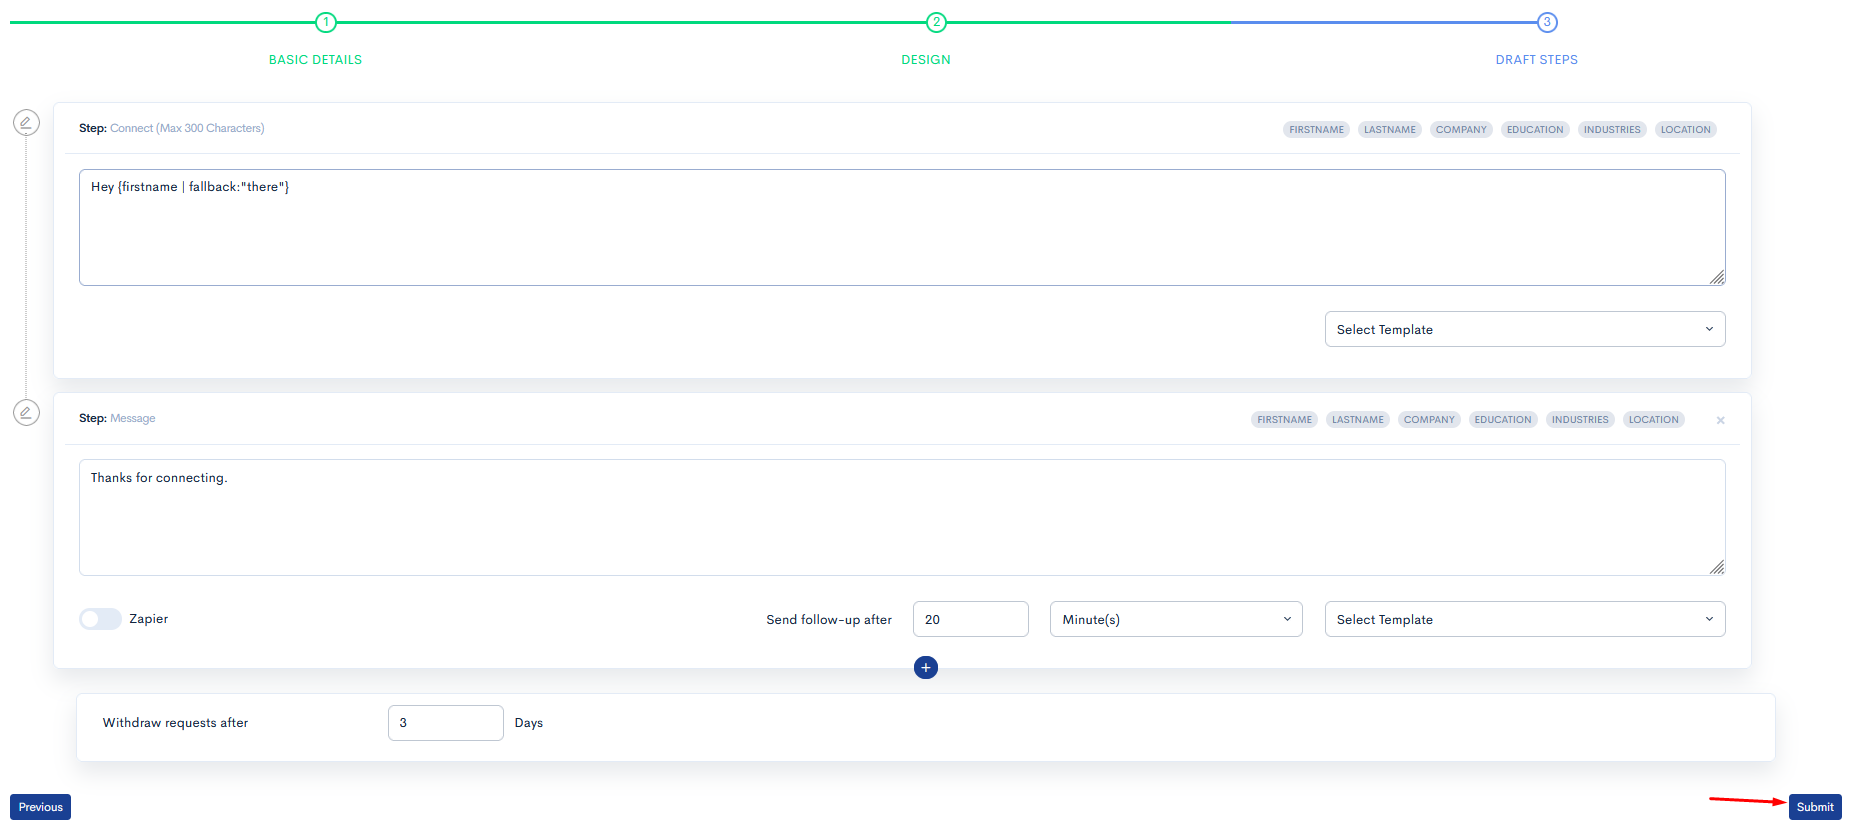
After click on Submit.
while finished all the steps you have to go campaigns sections. after you will start the campaigns and set a daily limits for sending connections/messages according to a subscription plan.

Click on sequence name.On display you have to see the Activity logs for that campaigns.
